I may have taken one too many photos with this project! ;) With this being a mini album and using such beautiful paper I couldn't help myself with the photos!
For my design team project with The Village Scrapbooker I'm working with Graphic 45 Twas the Night Before Christmas 8x8 paper, sticker sheet, and pockets and tags. I love this collection so much that I had to get the 12x12 paper too! I was assigned to make a mini album so I decided to make the 6 page boxed mini album designed by Paper Hoarder Disorder. You can stop by her blog to get the pattern for the boxed mini album.
Outer Part of the Boxed Mini Album
Outer Part of the Boxed Mini Album


For the top of the box I used the Happy Holly Day paper and then fussy cut the Santa from the Jolly old Elf page. I layered the Santa on chipboard for stability and dimension and then inked all the edges in Colorbox Chestnut ink.

From this angle you can see the dimension the chipboard adds to the Santa. On the sides of the box I used Bundles of Toys and Merry Mistletoe papers to decorate.

For the deer I used my Tim Holtz deer diecut and cut a deer from the Long Winter's Nap paper and also from chipboard. I glued the paper to the top of the chipboard and inked. I then used my versa mark ink pad and pressed the deer into it. Next, I applied my clear embossing powder and heated it. I did this whole process over again to get a shiny glossy deer accent. I absolutely love the way it turned out! I nestled the deer amongst the poinsettia and along Santa.

The poinsettias are probably my favorite!!! I'm in love!!!! I used my Tim Holtz Tattered Poinsettia die and Texture Fades Embossing Poinsettia folders to create a large, medium, and small poinsettia. Once they were cut and embossed I inked the edges and assembled. Once the glue dried I sprayed them with Heidi Swap Chartreuse spray. I finished each one off with Rose Gold Stickles in the centers. I love how they help frame the beautiful vintage Santa and title!!!
Now to open this beautiful box...

Once you open the box it opens to the right and the album slides off to the left! The entire box is lined with the Twas the Night Before Christmas Paper.
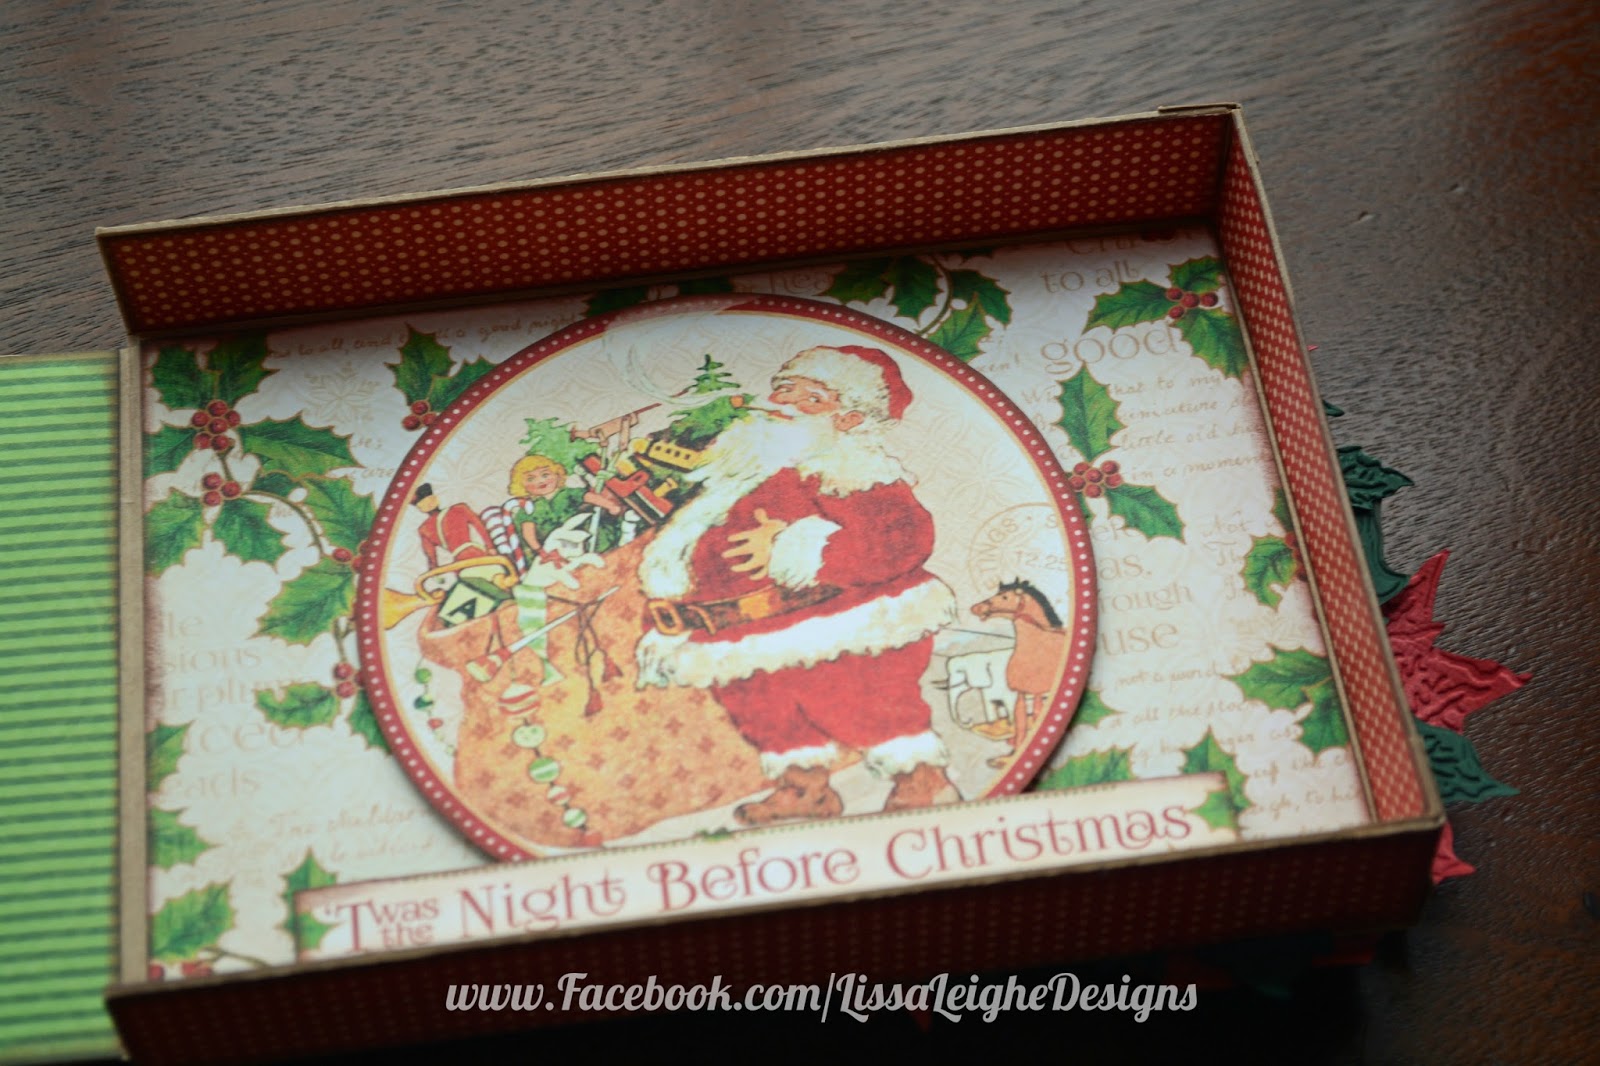
For the inside of the lid I used the Happy Holly Day paper and again fussy cut the Santa and title from the Twas the Night Before Christmas paper. I layered Santa and the title on some foam and glued them down.
On to the album's pages...
Page 1
Before we get looking at the pages I just want to state that there are magnetic closures on any page that has a flap.

There are 6 pages total in this album with front and backs it makes a 12 page album. Each of the 6 pages has a booklet that pulls out from the right side that has room for 4-4x6 photos which means this album will hold a ton of full size photos with no need to crop them!

For the booklets I used my paper and created some photo mats. I glued red ribbon underneath the photo mats to create a little pull to help pull the booklets out from the pages.

On page 1 I used my Martha Stewart punch on the edge of the page. I used Bundles of Toys paper to create a photo mat. The sticker was layered on chipboard and then cut out. I inked the edges and glued it down in the bottom corner over top of a hidden magnetic closure.

If you pull the Twas the Night Before Christmas sticker to the right it opens up to show two more photo mats.
Pages 2 & 3


Page 2 has a flap that I placed a pocket from the Graphic 45 Twas the Night Before Christmas pockets and tags sheet. In the pocket I placed an envelope that came from the same tags and pocket sheet. I also placed a couple cutouts in both.

The flap opens to the left to reveal the beginning of the poem Twas the Night Before Christmas. I used one of the cutouts and matted it to the flap. I also created another photo mat to the right of that.

On page 3 there is a pocket that holds a smaller booklet that could be used for more photos or just journaling. I used one of the cutouts to decorate the booklet. On the outside of the pocket I used this bracket style buckle from the tag sheet tied some twine and wrapped it around the pocket before gluing it down. You may also notice the ribbon showing to the right of the page. This is another one of the booklets that holds 4-4x6 photos. To save time I did not photograph every booklet.
Pages 4 & 5


On page 4 there is another flap and on that flap I created a bellyband using some scraps and a sticker from the sticker sheet. I used a tag from the pocket and tag sheet and then a tag was cut from the cutout sheet. I used an eyelet and twine to dress it up a little.

When you open the flap there is a journaling card that I cut out from the cut out sheet. There is another full photo mat to the right of that. I used the Handle with care sticker from the sticker sheet.

For page 5 I used this Merry Mistletoe paper. What may appear to be another full photo mat is actually a hidden trifold booklet. It's held closed by a magnetic closure.

The booklet opens to the left to reveal a couple tags for journaling. The Jolly tag I only applied glue to the bottom and right sides so it would act as a pocket. Again, notice the booklet's ribbon off to the right side that pulls out.

This is the trifold fully opened. The middle section I created another bellyband using another sticker and then placed a couple more cutouts.
Pages 6 & 7

For the flap on page 6 I created a bellyband and tucked a tag from the tag sheet in it for journaling.

On the inside of the flap there is another bellyband with more tags. The photo mat to the right is a cutout from the paper.

On page 7 there is a flap that opens up. I used two tags from the tag sheet and sandwiched a magnetic closure inside. There is another magnet under the photo mat to help keep the flap closed. Notice the booklet again to the right? :)
Pages 8 & 9

For pages 8 & 9 there is another flap and a vertical pocket with booklet. For the flap I matted it with paper and then added a pocket and tag.

The inside of the flap I glued a tag from the pockets and tag sheet. I only glued it down on the left and bottom sides in order to create a pocket to hold my tag. The tag is another place for journaling. Then I placed another photo mat to the right.

For page 9 there is a vertical pocket that holds a smaller booklet that can be used for smaller photos or journaling. From some scraps I fussy cut a clock and glued it to chipboard. I cut the chipboard to fit and did the same procedure that I did on the deer for the cover.

When you take out the smaller booklet it reveals this beautiful paper. I love this so much! This Santa is the same Santa that I fussy cut for the top of the box. Again, there is another pull tab for the larger booklet to the right.
Pages 10 & 11

For page 10 there is another flap with a bellyband to hold tags and pockets. On page 11 there is a diagonal pocket that holds a smaller booklet for smaller photos or journaling.

For the inside of the flap I used a cutout card.

For the diagonal pocket I used twine and a tag that was popped up on foam to dress it up. Also, there is the last of the 6 booklets to the right.
Page 12 and the Back of the Box

As you turn to the last page you see page 12 and the back of the box. This is what the box looks like completely opened.

For page 12 there is another flap with a cute Santa pocket and tag.

When you open the flap there is a tag that is popped up on foam.

For the back of the box I created a double pocket. The back pocket holds a 4x6 cutout that can be used for journaling and a photo mat. The front pocket holds plenty of smaller tags and cutouts. I also used a sticker from the sticker sheet.
Well, that is all! I really enjoyed working with the Graphic 45 Twas the Night Before Christmas Collection! It truly is beautiful and the pocket and tags and stickers are fantastic for any mini album project!!! I'm glad I picked up the 12x12 paper because it will make for some awesome scrapbook layouts too! Stop by The Village Scrapbooker to see my album in person and to pick up any scrapbooking supplies you may need to create this project. If you have any questions stop by my facebook page www.facebook.com/LissaLeigheDesigns and I will answer any questions you have! TFL!